|
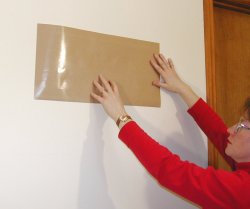
Position your lettering stencil and secure in place with low tack tape. Use a level to ensure accurate horizontal placement.
|
|
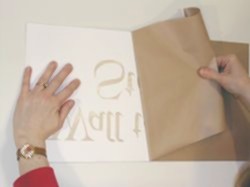
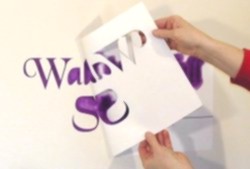
Grasping the bottom edge, flip up the entire stencil. The top edge should still be held securely in place by low tack tape.
|
|
Peel off the backing (brown paper), being careful not to pull off the centers of letters (ie., the letters a, b, d, g, o, p, and q each have centers that need to remain with the stencil).
|
|
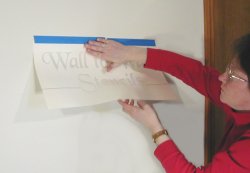
After you've pulled off the back layer, carefully flip the stencil back up into position. Press firmly all along the stencil to make sure it is securely adhered to the wall.
|

|
Remove the top layer (transfer tape) which resembles manila colored masking tape, making sure that letter centers are adhered to the wall, not to the transfer tape.
|
|
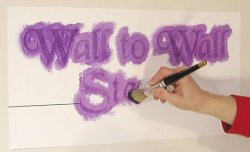
Apply paint to the stencil openings using a stencil brush. We do not recommend using a foam roller. Stencil brushes produce more crisp and clean letters.
|
|
Lift off the stencil.
|

|
The design should be almost complete.
|

|
The very last step requires that you simply lift off letter centers with a tweezers, pin, or craft knife.
|

|
Voila!
|